 Save
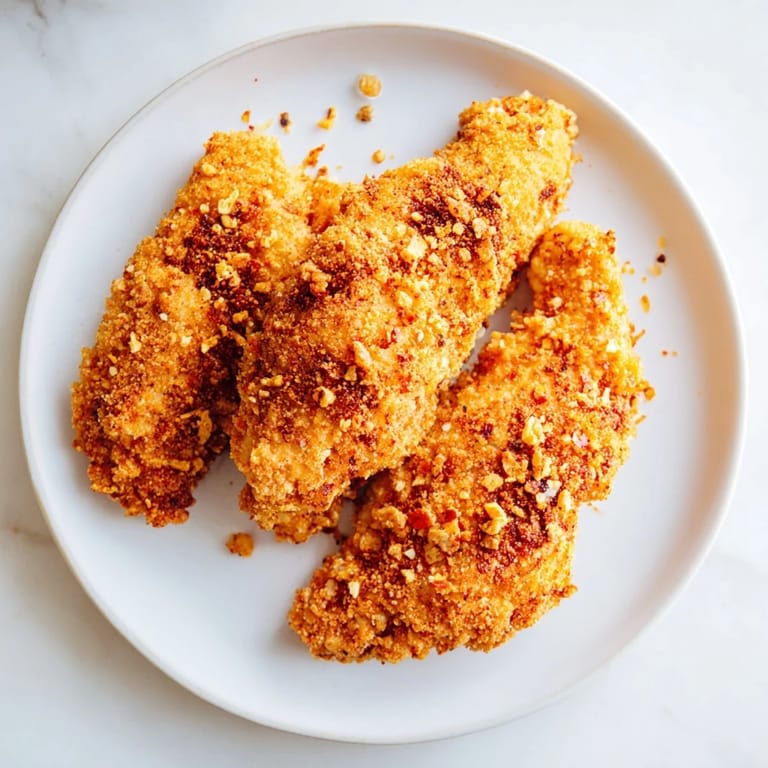
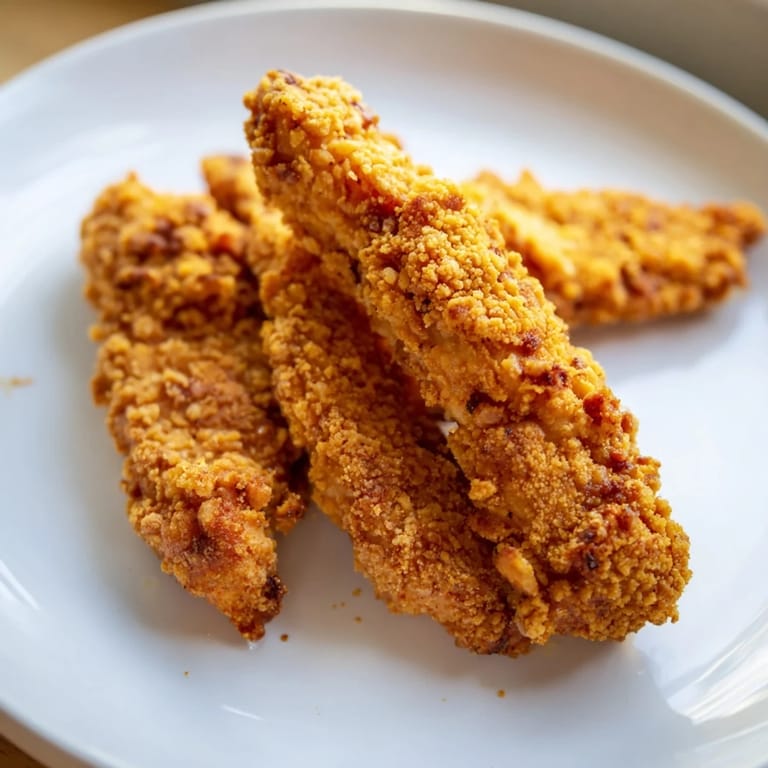
Save There's something about the sound of chicken hitting hot oil that instantly transports me back to my aunt's kitchen on lazy Sunday afternoons. She'd stand at the stove with this completely unfazed expression, never flinching as the pan erupted in violent sizzles, while I watched from the counter convinced she was performing some kind of culinary magic. Turns out it wasn't magic at all—just buttermilk, flour, and the kind of patience that comes from making something a hundred times before. These tenders are exactly what I learned from her, golden-brown crispy on the outside and impossibly juicy within, the kind of thing that makes people stop mid-conversation to ask for your secret.
I made these for my roommate's surprise birthday dinner last spring, and I remember standing in the kitchen at 6 PM wondering if I'd bitten off more than I could chew—the marinade had been sitting since morning, the oil was heating, and I had exactly forty minutes before people arrived. But the moment those golden tenders came out of the pan and I lined them up on paper towels, still steaming and crackling slightly, I knew it was going to be fine. We served them with three different sauces and they were gone in twenty minutes, which meant the evening was already a success before dessert even happened.
Ingredients
- Chicken tenders (500g): Use the thinner, more tender cuts rather than breasts—they cook through faster and stay juicier, plus they're naturally the right size for that perfect bite.
- Buttermilk (240ml): This is non-negotiable for tenderness; regular milk won't do the same job, and if you're in a pinch, mix regular milk with a splash of lemon juice or vinegar.
- All-purpose flour (180g): Measure it properly or the coating gets gluey—fluff it first with a fork, spoon into your measuring cup, then level it off.
- Paprika, salt, black pepper, garlic and onion powder: These create the seasoning backbone; don't skip the garlic and onion powder because they add a savory depth that flour alone can't deliver.
- Baking powder (1 tsp): This ingredient is what separates good fried chicken from transcendent fried chicken—it creates those little air pockets that make the crust shatter when you bite it.
- Vegetable oil (500ml): Keep the thermometer handy because 175°C is the sweet spot; too hot and the outside burns before the inside cooks, too cool and you get greasy tenders instead of crispy ones.
Tired of Takeout? 🥡
Get 10 meals you can make faster than delivery arrives. Seriously.
One email. No spam. Unsubscribe anytime.
Instructions
- Prepare the marinade:
- Whisk together the buttermilk with salt, black pepper, garlic powder, and onion powder until the seasoning dissolves completely. Add the chicken tenders and make sure every piece gets coated—this is where the magic starts happening.
- Marinate the chicken:
- Cover the bowl and let it sit in the fridge for at least an hour, though overnight is genuinely better if you can plan ahead. The longer the buttermilk works on the meat, the more tender it becomes.
- Mix the coating:
- In a shallow dish, combine the flour, paprika, salt, black pepper, cayenne pepper if you want heat, and baking powder. Stir it together thoroughly so the seasonings are evenly distributed throughout the flour.
- Heat your oil:
- Pour the vegetable oil into your deep skillet or Dutch oven and heat it over medium-high heat to 175°C (350°F). Use a thermometer to check—this matters more than you might think.
- Coat the chicken:
- Remove each tender from the marinade, let the excess buttermilk drip off for just a second, then dredge it in the flour mixture, pressing gently so the coating sticks. If you want extra crunch, dip it back in the buttermilk and coat again.
- Fry in batches:
- Carefully place the tenders in the hot oil, being mindful not to overcrowd the pan because that drops the temperature and makes everything greasy. Fry for 4 to 5 minutes per side until the exterior is golden brown and the internal temperature reaches 75°C (165°F).
- Rest and serve:
- Transfer the cooked tenders to a paper towel-lined plate and let them sit for a couple of minutes—this lets them firm up slightly and isn't just about draining oil, it's about texture.
 Save
Save The first time someone told me these tenders tasted restaurant-quality, I laughed because I was standing there in pajamas at 11 PM with flour dust on my face. But that moment crystallized something I'd been learning gradually—that food doesn't need to be complicated to be impressive, it just needs attention and decent ingredients. These tenders proved to me that the home-cooked version could absolutely compete with the fried chicken place down the street.
The Buttermilk Secret
Buttermilk is doing something chemically that's worth understanding, even if you never think about it again. The acidity tenderizes the chicken by breaking down the proteins gently, and the fat content keeps it moist through the whole frying process. I've tested this with regular milk, yogurt, and even just marinating in oil and seasoning, and every single time the buttermilk version comes out noticeably juicier. It's the kind of thing that seems small until you taste the difference side by side.
Temperature and Timing
The biggest variable in fried chicken is heat management, and it's also the easiest thing to get wrong. I learned this the hard way by frying at temperatures that felt right but produced inconsistent results—some batches golden and crispy, others pale and greasy. Once I started using a thermometer religiously, everything stabilized immediately. The oil needs to be hot enough to cook the outside quickly before the inside dries out, but not so hot that the breading blackens while the chicken is still raw in the middle.
Seasoning and Crunch
The paprika in the coating adds color and a subtle depth that straight salt and pepper can't achieve, while the cayenne is there if you want a gentle heat that builds as you eat through them. But here's what I wish someone had told me earlier: the baking powder is actually the crispness MVP. It creates tiny air pockets in the crust that turn it into something that shatters between your teeth instead of just being firm. Double-dipping—buttermilk, flour, buttermilk, flour—gives you an extra-crunchy layer that's worth the thirty seconds of extra effort.
- Taste your seasoning mixture before you coat anything and adjust it to your preference because you can't change it once the chicken is fried.
- If you're making these for someone with dietary restrictions, that gluten-free flour blend works surprisingly well as long as it has a good binding agent in it.
- Serve these hot with something tangy like honey mustard or ranch, because the acid cuts through the richness and makes you want to eat more than you probably should.
 Save
Save These tenders have become my default move when I need to impress people quickly, which says everything about how reliable they are. Whether it's a weeknight dinner that needs to feel special or the kind of meal that turns a regular evening into a memory, they deliver every single time.
Recipe FAQ
- → How do I achieve extra crispy chicken tenders?
Double-dip by coating the tenders in buttermilk and flour twice before frying to build a thicker, crunchier crust.
- → What oil is best for frying chicken tenders?
Vegetable oil with a high smoke point is ideal for frying to maintain even heat and crispness.
- → Can I marinate chicken tenders longer than one hour?
Yes, marinating overnight can enhance tenderness and flavor, but avoid exceeding 24 hours to prevent texture changes.
- → Is there a spicy option for the coating?
Adding cayenne pepper to the flour mix offers a mild heat that complements the seasoned crust.
- → How do I know when the chicken is fully cooked?
Fry until golden brown and an internal temperature of 75°C (165°F) is reached for safe, juicy meat.
- → Can I replace all-purpose flour for gluten-free coating?
Yes, substitute with a gluten-free flour blend to accommodate dietary needs without sacrificing texture.